Getting Started
In this Getting Started guide, we will walk through the steps of creating a Dapp account with Notifi, setting up a notification topic, signup card, and allowing users to subscribe to that topic. By the end of this guide, you will be able to send your first message!
Signing Up For Notifi
To sign up your Dapp for Notifi, create an account on the Notifi Admin Portal.
Once you've set your email address, password, and company name, expect a verification email for that email address. Once you verify your email, you can then log into Admin Portal and begin setting up notifications!
Setting Up A Notification Topic
The first step is to define notification topics that users can subscribe to. A topic is a category of alerts tailored for a specific use case or user group, ensuring relevant and meaningful notifications.
Notifi has three types of notifications:
- Messages written in Community Manager in Admin Portal
- Messages triggered by your server through the Notifi SDK
- Messages triggered by Notifi-hosted code, usually in response to on-chain events
📌 For a more in-depth understanding of different topic types and their use cases, please refer to the following resources: 🔗 Topics in Detail
For this Getting Started guide, we will be creating a Community Manager topic. Check out our self-hosted and Notifi-hosted guides for writing for the other two types.
To create a Community Manager topic, go to the Alert Manager, click Create Topic, then Send announcements from Community Manager. In the dialog box that appears, set the name of your topic and click Create. Example here
Setting Up Your Signup UI
The easiest way to set up signup UI for your users is the Notifi React Card, a React component that you can integrate with your application. This has two steps: creating the UI Card config in Admin Portal, and adding the card to your application.
Creating a UI Card Config
To create your UI card configuration, go to the UI Config tab in Alert Manager, then click Create UI Card.
You'll be presented with the Edit UI Card screen, which will let you edit your card and show you a preview.
- Enter a name for your card.
- Set the wallet type that you want to use to connect to the card. For this example,
we will use Ethereum (though the instructions will be the same for any EVM chain).
- Note that each card config only supports one wallet at a time. If you want to allow signups across multiple blockchains, create a separate card for each.
- Click Select Topics, then on the dialog box that pops up, click the check box next to the Community Manager topic you created earlier. Click Save to put the Edit UI Card back in focus.
- If you wish, add a tooltip to your topic by clicking the Add Tooltip button. In the dialog box that appears, type a short note to explain your topic.
- Under Destinations, click the switches next to the destination types you want to enable. For this Getting Started guide, we will just activate "Email", as that requires the least setup.
- Click Save Card in the top right corner of the screen.
You're all done! Leave this page open so that you can reference the Card ID when you add the card to your application.
🔗 Check out the Card Configuration Guide Example for a detailed walkthrough with screenshots.
Additionally, to enable notification destinations like Telegram and Discord, and to add your own custom email domain for sending notifications to your user base, refer to this guide: 🔗 Notification Destinations Setup
Setting Up a React Application With Your Card
Now that we have a card config, we'll go through the process of adding it to a React application.
Looking for more in-depth knowledge on our React Card?
This example will be using Ethereum. Setting up the React card for a different EVM chain only requires changing the chain name, but setting up the React card for different chains requires different boilerplate for each. Check out the Notifi React card SDK for examples of how to use the React card with other chains.
First, either open your existing React or Next.js project, or create a new one.
Installing the Correct Packages:
Environment
- Node version >= 18 (with corresponding npm version)
- React version >= 17"
Packages
Implement The Card:
With the card configuration set up, the next step is to integrate the Notifi React Card into your React application
📌 Design Guidance: We provide design recommendations in our Figma Guide to help you effectively present the UI within your dApp. However, the visual implementation remains fully flexible, allowing you to customize it to match your design preferences.
Mount the NotifiCardModal to your dApp
IMPORTANT: To use
NotifiCardModal, you need to wrap your component withNotifiContextProviderfirst.Example Quick Start for Ethereum
import {
  NotifiContextProvider,
  NotifiCardModal,
} from '@notifi-network/notifi-react';
import { useEthers } from '@usedapp/core';
import { providers } from 'ethers';

// Import the default Notifi styles for proper UI rendering
import '@notifi-network/notifi-react/dist/index.css';

const NotifiCard = () => {
  const { account, library } = useEthers();
  const signer = useMemo(() => {
    if (library instanceof providers.JsonRpcProvider) {
      return library.getSigner();
    }
    return undefined;
  }, [library]);

  if (account === undefined || signer === undefined) {
    // account is required
    return null;
  }

  return (
    // tenantId and cardId are found on the Notifi Admin Portal.
    <NotifiContextProvider
      tenantId="YOUR_TENANT_ID" // dApp ID
      cardId="YOUR_CARD_ID" // Card ID
      env="Production"
      signMessage={signMessage}
      walletBlockchain="ETHEREUM"
      walletPublicKey={account}
    >
      <NotifiCardModal darkMode={true} />
    </NotifiContextProvider>
  );
};
Subscribe to your card
Now, run your dAPP locally and subscribe to the card in the respective render!
🔗 For a complete working example and best practices, check out our Example Integration Repository.
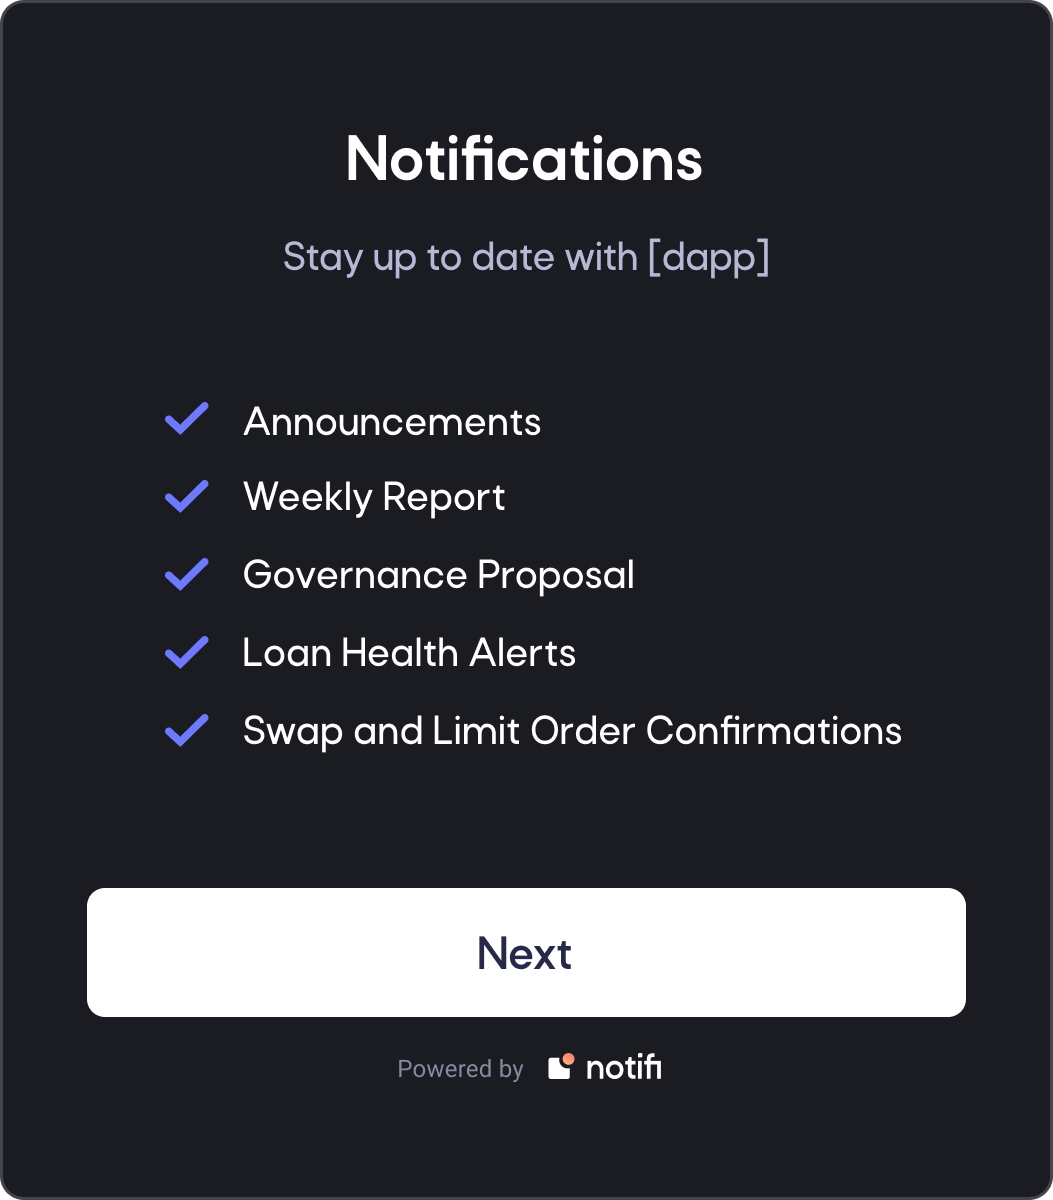
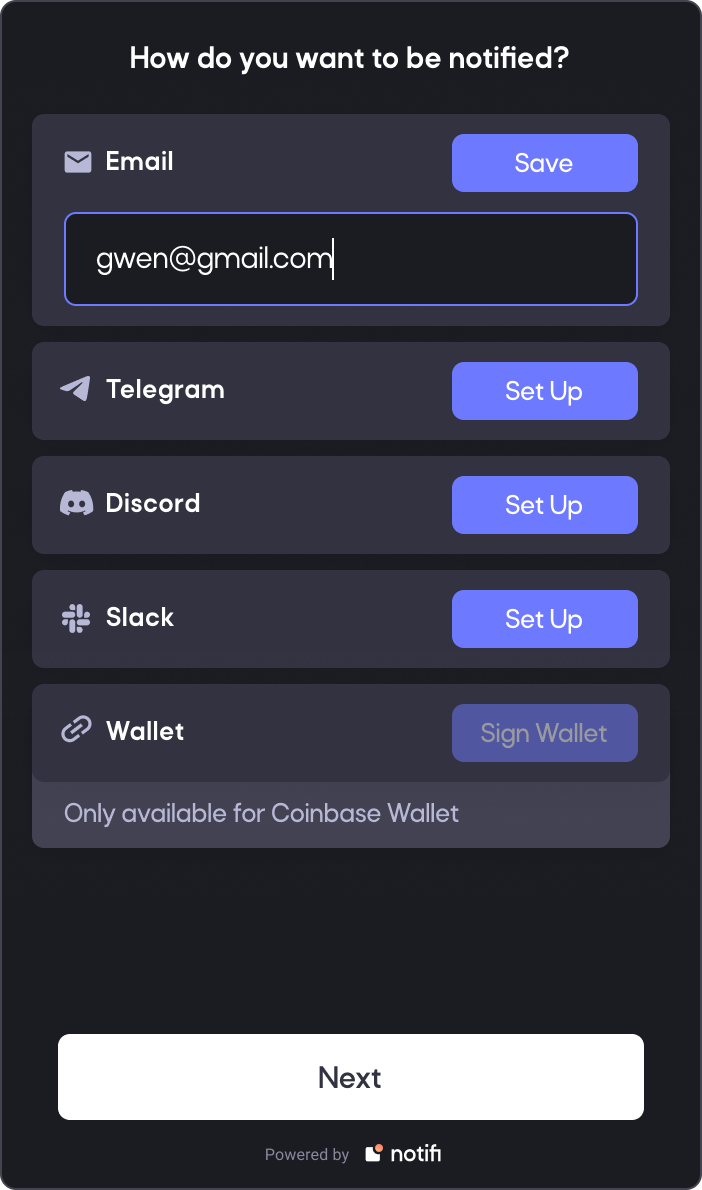
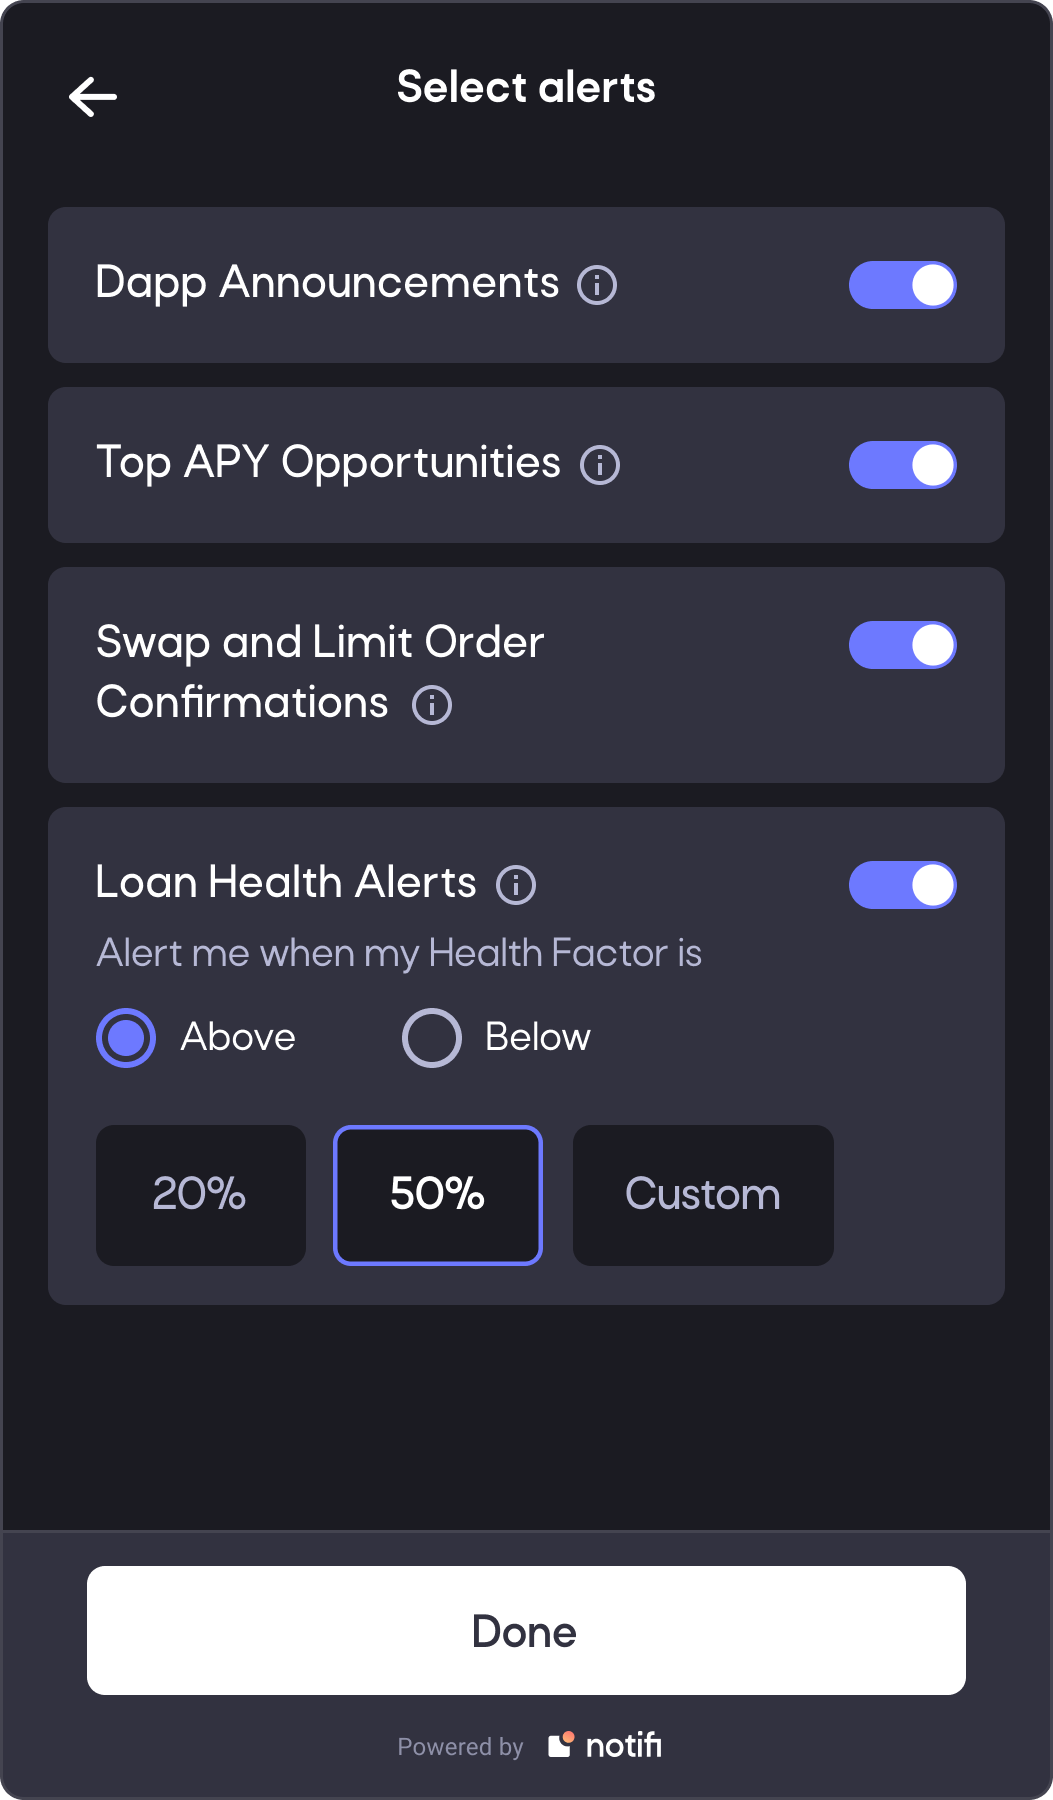
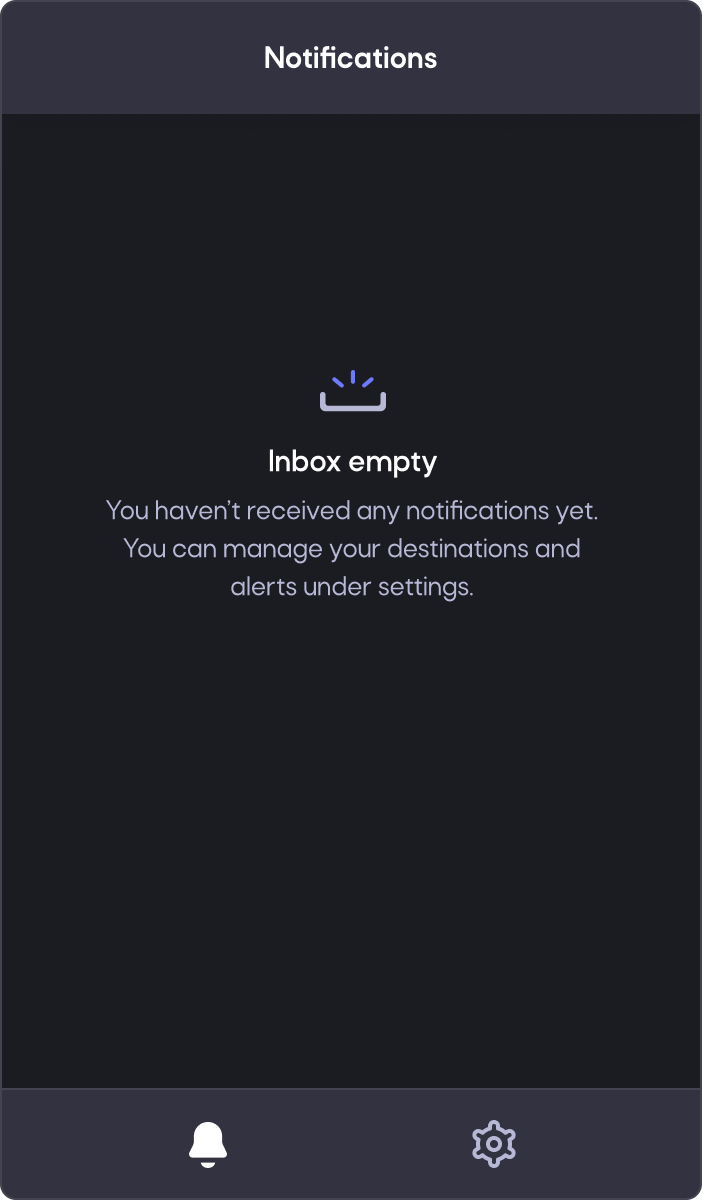
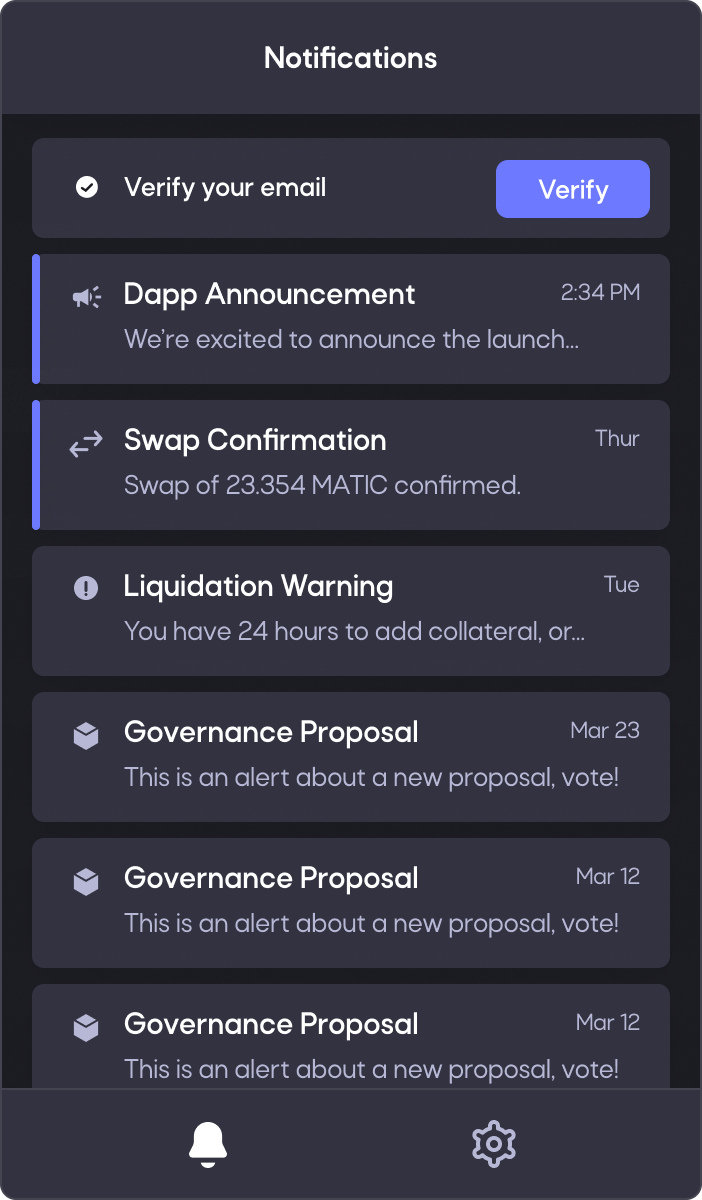
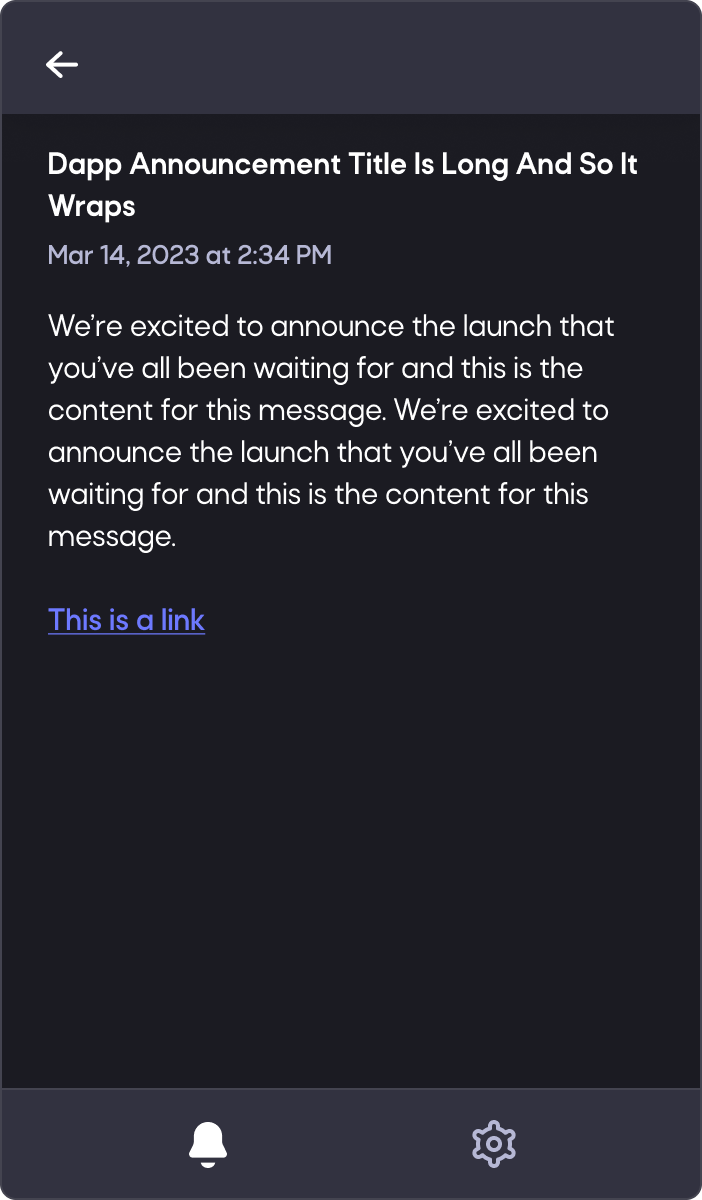
Below are screenshots demonstrating how your card UI will look during the subscription process. You can sign up, subscribe to topics, and check notifications inside the card’s inbox section.
Sending Your First Message
Finally, now that we have a topic and a user signed up to it, it's time to send a message!
- Navigate to the Community Manager page in Admin Portal.
- Click the "+ Compose" button.
- Under Audience/Notification Topic, select the Community Manager topic you created.
- Enter a name in the Campaign Name field. Your audience won't see this name - it's just used to uniquely identify the message for reporting.
- Choose the destinations for your message.
- Alert History is always selected.
- In this example, we'll also add Email.
- In the Alert History section, enter the subject and message you want to send.
- Copy the subject and message into the Email section. (Here, you can add extra details and formatting, such as lists or images.)
- Click the Publish button at the bottom.
- Within a few moments, you should receive an email at the address you provided to your Notifi card.
- You should also see the message in the Notifi card's Inbox screen!
Next Steps
Learn More About Community Manager
For more details on how to use Community Manager to send messages and manage campaigns, view our Figma walkthrough here.
Event-Triggered Notifications
In addition to sending messages manually using Community Manager, notifications can also be triggered based on events, both to your general audience and to specific destinations. Notifi offers two separate avenues for this - notifications from self-hosted services through the Notifi SDK, and notifications from custom code hosted on Notifi's servers that follow on-chain events. Check out the quickstart guides for these:
Adding Additional Destination Platforms
Notifi notifications can be delivered through email, Telegram, Discord, Slack, and more. A few of these platforms require you to supply a bot for Notifi to use. It is also possible to send email via your own custom domain:
Style Your Notifications
Notifications can also be templated and styled. Check out our template guide!
Set Up Custom Notification UI
The React Card is the simplest way to set up UI for signing up for notifications, but a more comprehensive frontend client is also available. Check out our guide for integrating it!
Additional resources
- Notifi Blog
- Notifi Demos
- How To Guide of our Community Manager and Admin Portal
Get Help
- Reach out to the key Notifi contacts