Creating a card config
In order to use the Notifi React Card a card config needs to be created accordingly. The card config serves as configuration of the React Card and enables multiple flexible uses of the React Card.
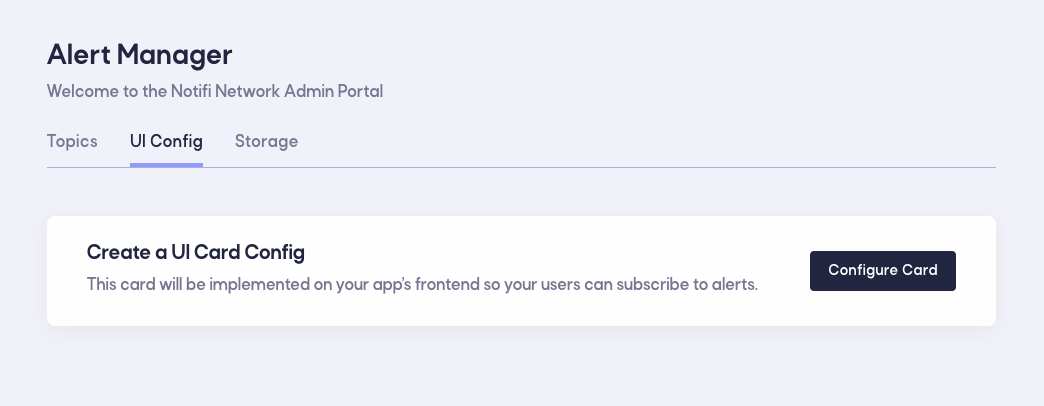
Step 1
Log in to the Admin Portal (create an account if you haven't done so already) and head to the Alert Manager page. Select the UI Config tab and click on "Configure Card" or "+ UI Card".
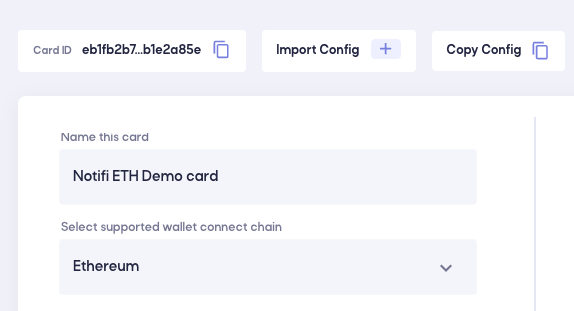
Step 2
Give your card config a name. This name will never be shown to the end user, however we recommend using a descriptive name to easily distinguish different card configs from each other in the future. Select the blockchain that users will be connecting their wallet from for this card.
Currently one card can only support one blockchain at the same time. If you have users from multiple chains, create a seperate card config for every chain and determine in the frontend which card config to load based on which chain the user is connecting from.
Step 3
Add the topics you have previously created (see here) to the card config.
The same topic can be used on multiple card configs.
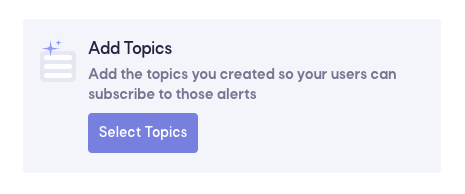
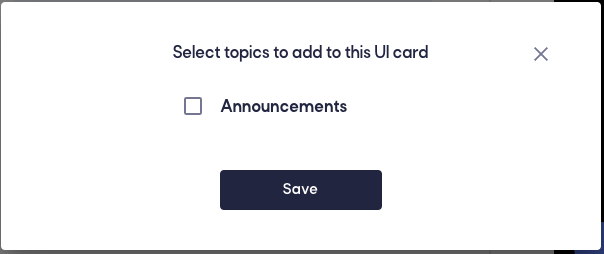
Optional: Add tooltips to the topics that help users understand what alert they are subscribing to.
Step 4
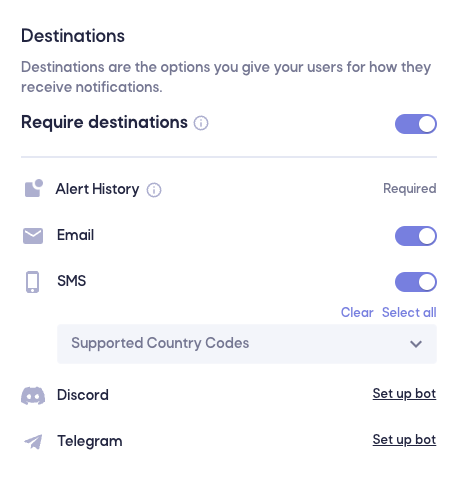
Select which destinations you want to allow for this card config. Destinations are equivalent to targets.
Check out these sections to set up custom targets:
Step 5
Save your card config and copy the Card ID in the top. This is the cardId param you will need in the react component here:
import {
  NotifiContextProvider,
  NotifiCardModal,
} from '@notifi-network/notifi-react';

// Import the default Notifi styles for proper UI rendering
import '@notifi-network/notifi-react/dist/index.css';

return (
  // tenantId and cardId are found on the Notifi Admin Portal.
  <NotifiContextProvider
    tenantId="YOUR_TENANT_ID" // dApp ID
    cardId="YOUR_CARD_ID" // Card ID
    env="Production"
    signMessage={signMessage}
    walletBlockchain="ETHEREUM"
    walletPublicKey={account}
  >
    <NotifiCardModal darkMode={true} />
  </NotifiContextProvider>
);