Easy Subscribe
With the Easy Subscription feature, users can subscribe to Community Manager topics directly, without needing to create a Notifi account, sign up on the Notifi React Card, manage notification preferences, or sign their wallet. Users can subscribe using their email address and have the option to receive notifications via a Telegram bot.
Creating an Easy Subscribe Card Config
To use the Easy Subscribe feature, a respective Easy Subscribe card configuration must be created. This configuration sets up an Easy Subscription campaign and provides the necessary endpoints: allowing you to directly use these URLs to join the Telegram bot and send to email addresses for subscribing to Community Manager topics.
Step 1: Initial Setup – Create a Notifi account and set up Community Manager topics
Visit this page and follow the first two steps to get started.
Step 2: Create a Card Configuration
-
Log in to the Admin Portal and head to the Alert Manager page.
-
Select the UI Config tab and click on "+ UI Card".
-
Then, click the Next button on the Easy Subscribe Card.
Refer to the attached screenshot for guidance.

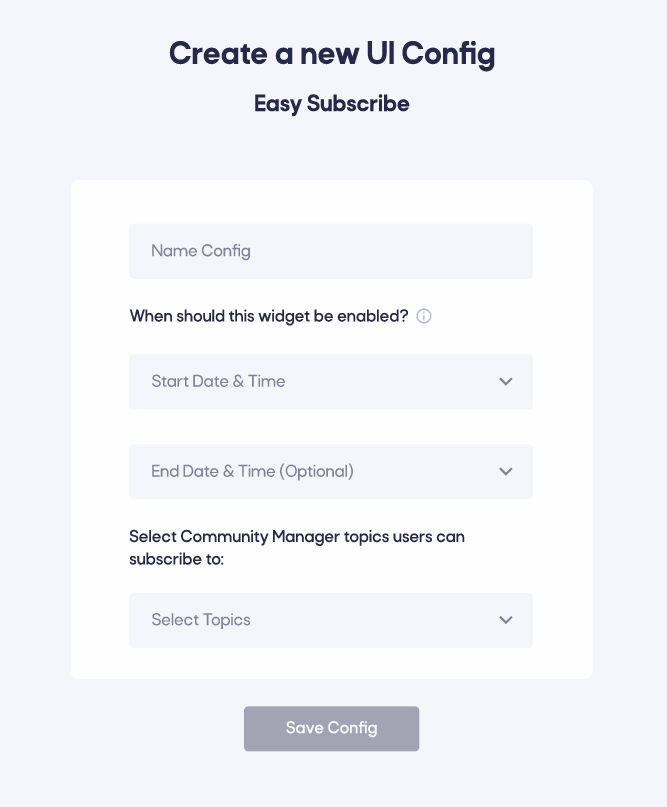
Step 3: Config your campaign
-
Name your Easy Subscribe Config. While this name is not visible to end users, we recommend choosing a descriptive name for future reference.
-
Add the campaign's start and end date. Registration will be disabled once the end date is reached.
-
Add the topics you have previously created (see here) to the card config.
The same topic can be used on multiple card configs.
Step 4: Save and Copy Endpoints
-
Save your card configuration.
-
Copy the Email, Telegram and Discord endpoints (if the Telegram bot is already added) from the bottom of the card.
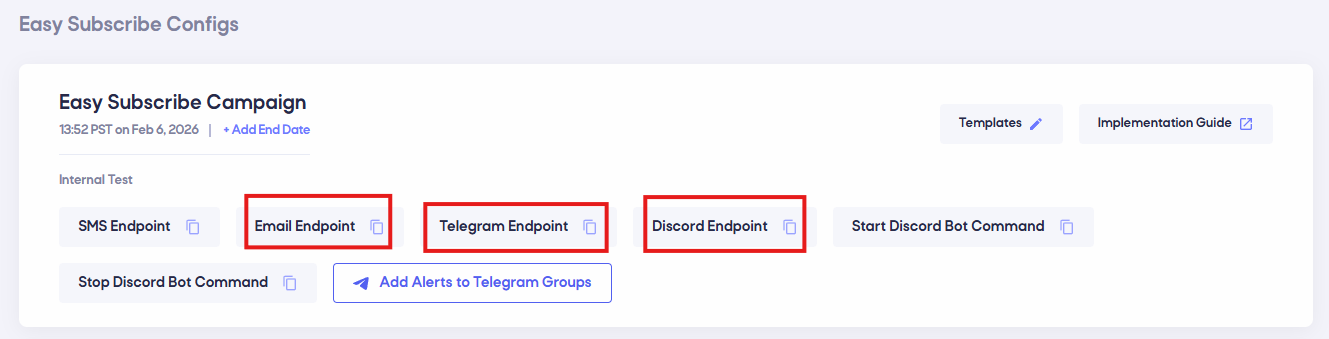
Check out these sections to set up your Telegram bot and Email domain:
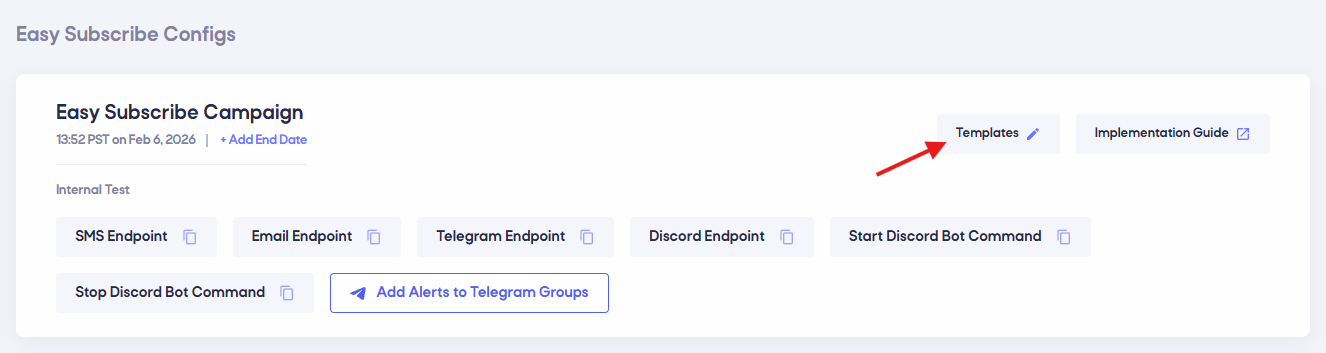
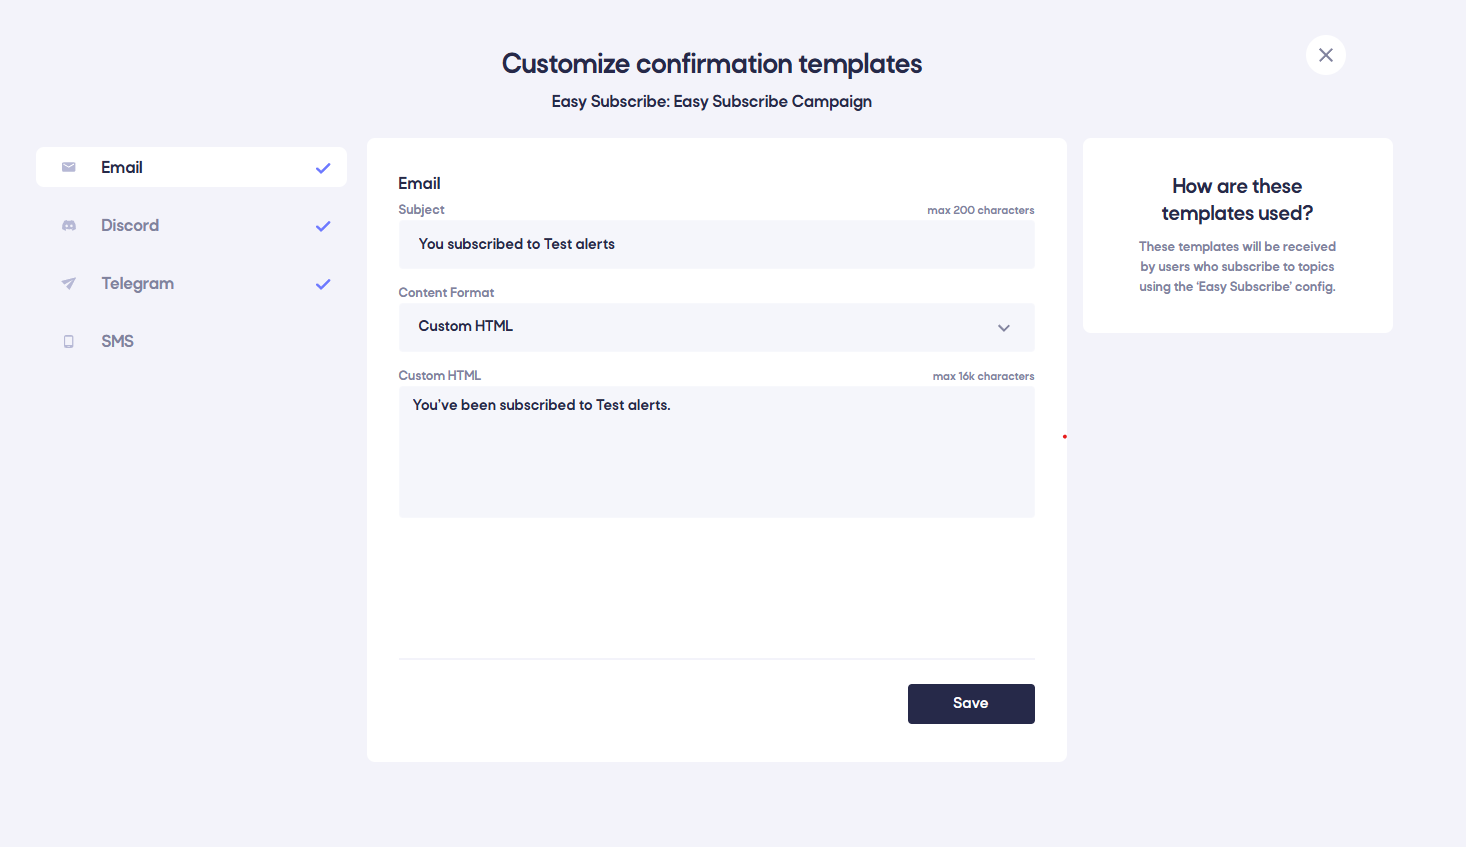
Step 5: Add Templates
These templates will be sent to users who subscribe to topics using the Easy Subscribe config. They can be in the form of a greeting or confirmation Email/Telegram message, which the users will receive on their respective platforms upon subscribing to topics.
To upload the templates for each destination, click on Templates within the Easy Subscribe config card. Refer to the attached screenshot for guidance.
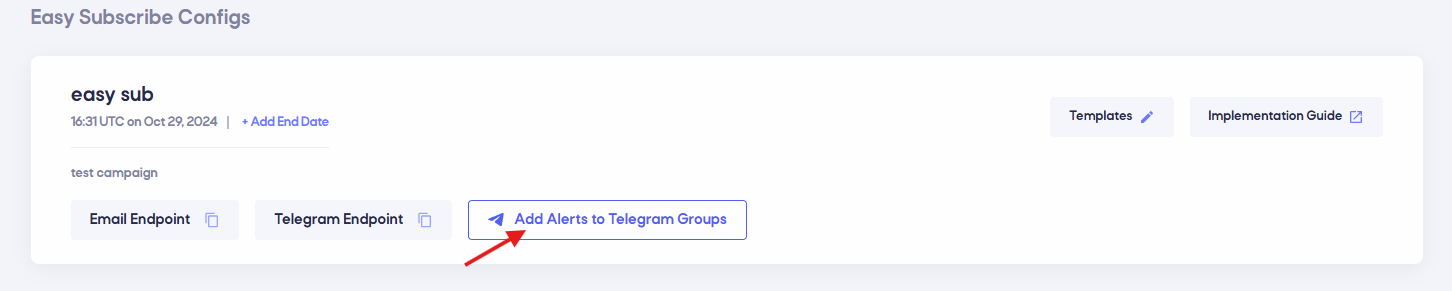
Step 6: Adding Alerts to Telegram Groups
With our latest feature, Notifi Admins can now integrate their Telegram bot directly into existing Telegram groups. This integration ensures that any alert sent through the Admin dashboard for community manager topics will also be received in these selected groups.
Follow the steps below to add the bot to your Telegram groups:
-
Click on "Add Alerts to Telegram Groups" to initiate the setup. (Refer to the image below for guidance)
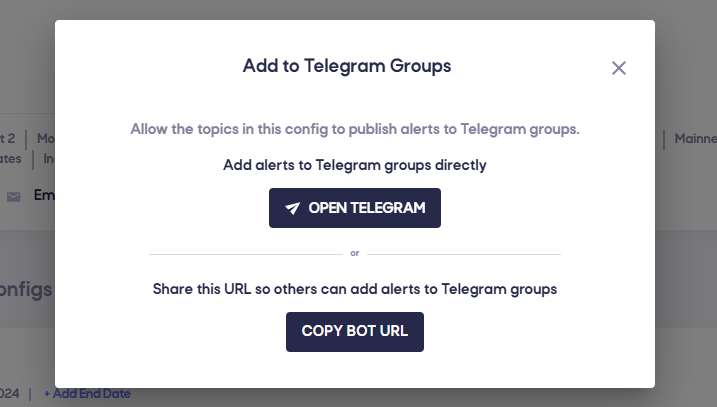
-
You have two methods to add your bot to Telegram groups:
2.1 Direct Access via Telegram App
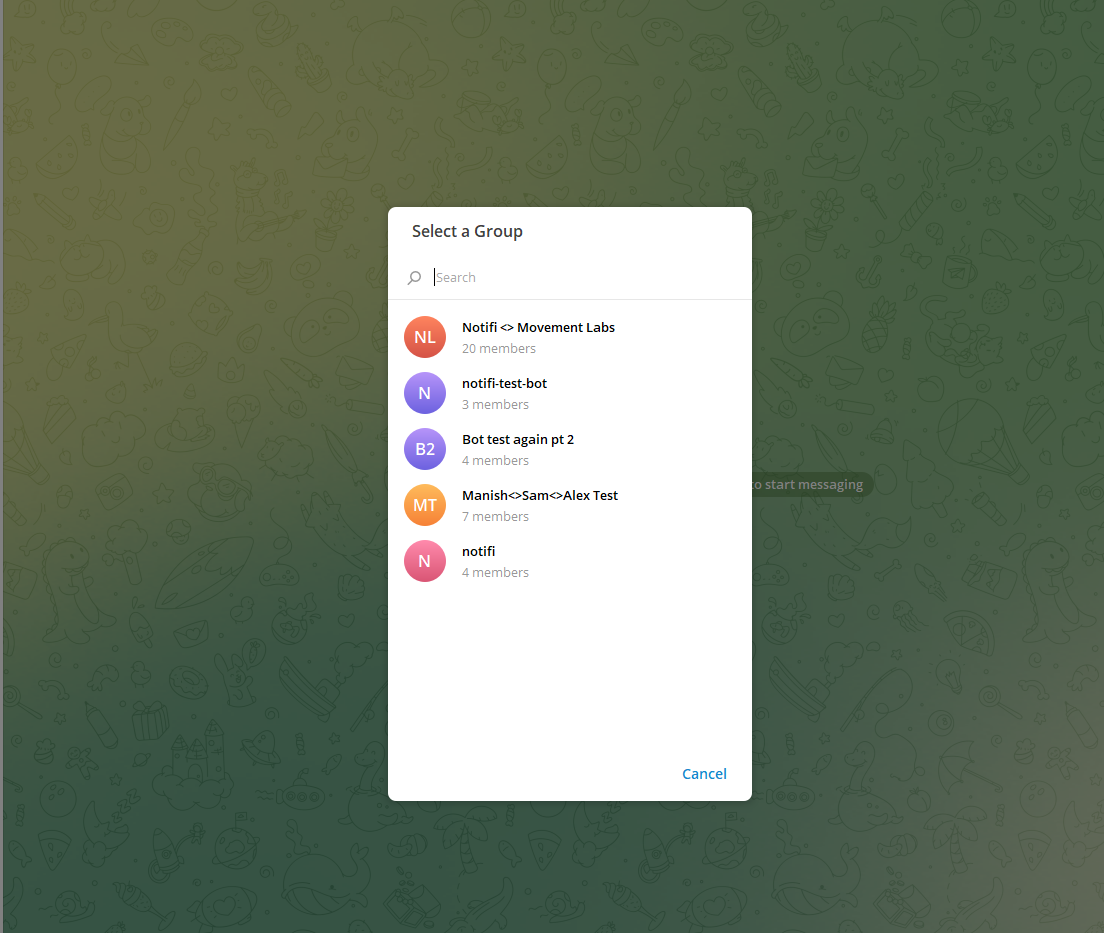
- 2.1.1 Click on OPEN TELEGRAM to be redirected to your Telegram application.
- 2.1.2 Once in Telegram, select the desired groups where you want to receive alerts.
2.2 Copy and Share the Telegram Bot Link
- 2.2.1 Copy the provided URL and paste it into a browser/device where you are logged into Telegram.
- 2.2.2 Alternatively, you may share this URL with other admins to add the bot from their sessions.
Refer to the attached screenshot for guidance.
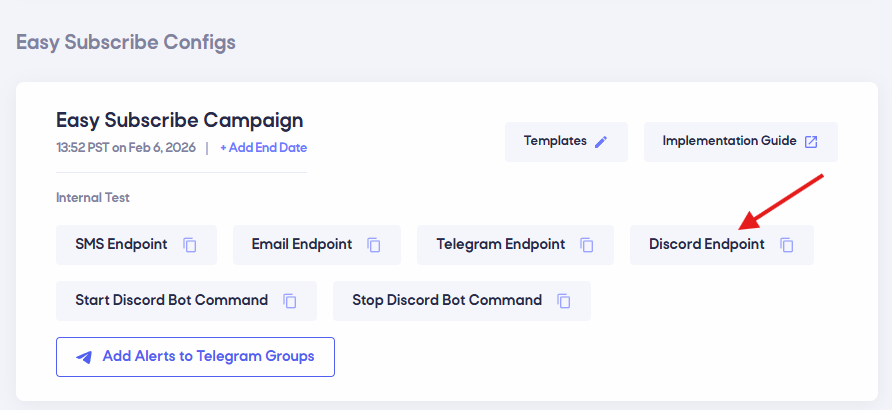
Step 7: Adding Alerts to Discord Channels
With our latest feature, Notifi Admins can now integrate their Discord Bots bot directly into existing Discord channels. This integration ensures that any alert sent through the Admin dashboard for community manager topics will also be received in these selected groups.
Follow the steps below to add the bot to your Discord channels:
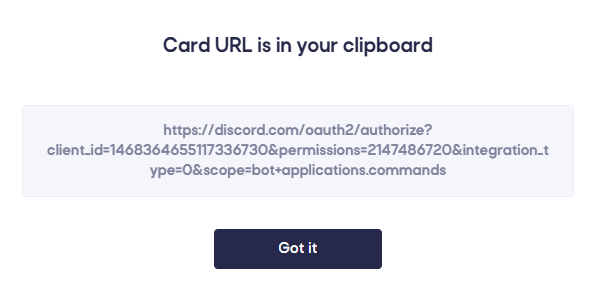
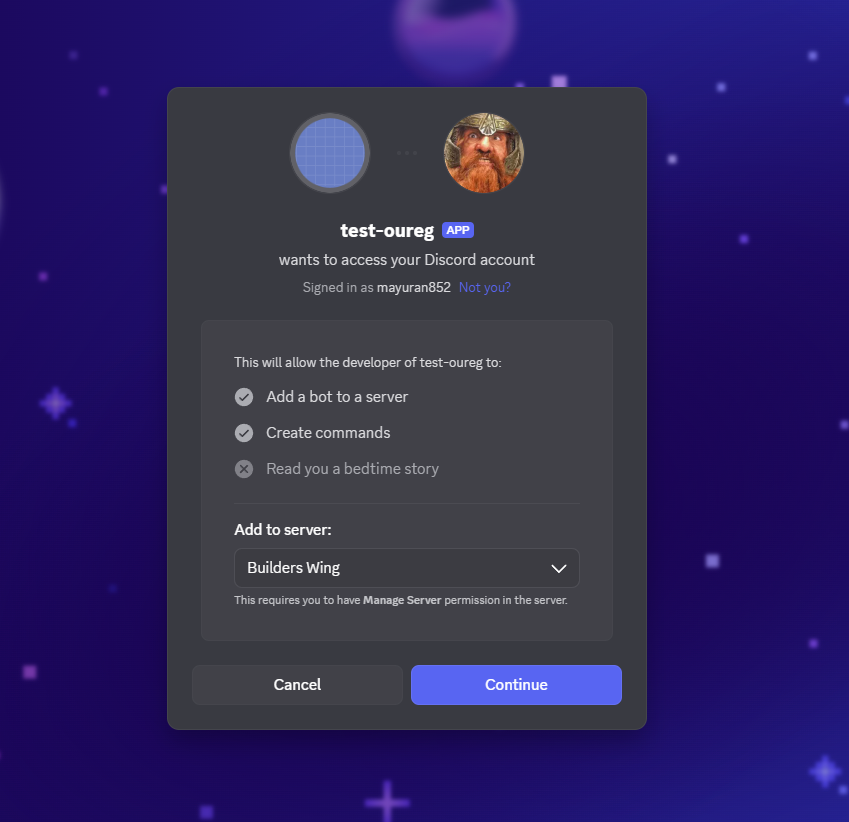
Click on "Discord Endpoint" to initiate the setup. (Refer to the image below for guidance)
Add and authorize the Bot to your Discord Channel. Note you require Admin Access to your Discord Server in order to complete this. Copy and paste the url into your browser.
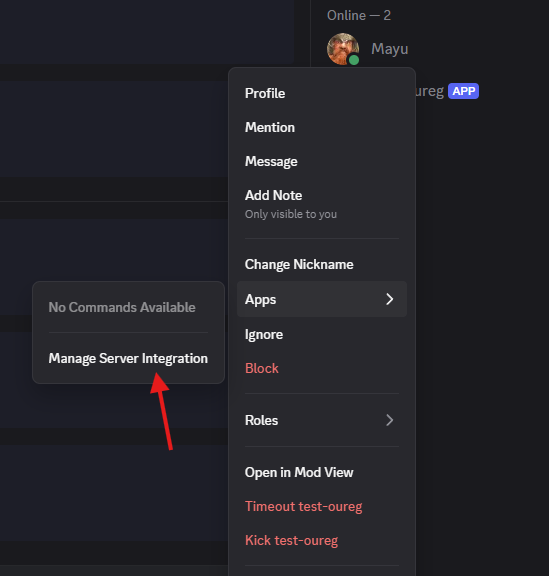
1.1 Configure Bot Role Interactions
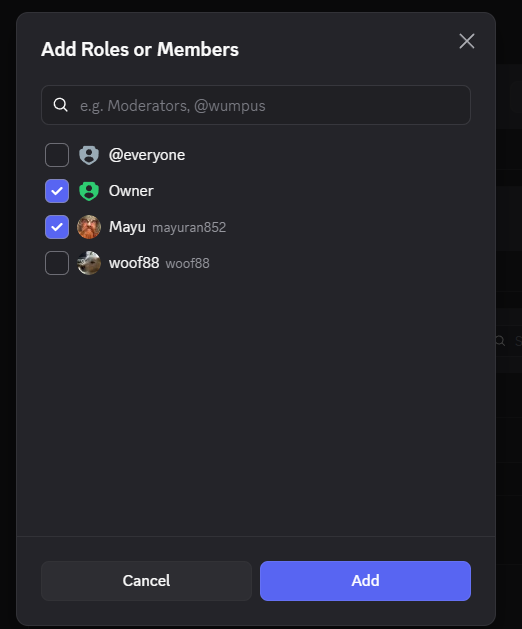
We would like for Notifi Admins to control enabling and disabling of their Discord Campaigns. Before starting a Bot, ensure relevant roles are assigned to control Bot Commands.
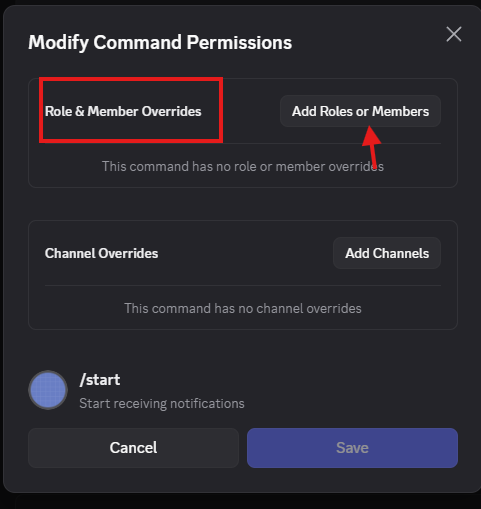
Below are the registered commands when you've created your bot.

Click on both commands, and ensure you've selecting the appopriate roles for server users who choose to interact with your Bot (Pertaining to your pre-existing roles: Admins, Mods, Etc.)
Once selected for start, follow 1.1 to configure /stop commands.
2. Starting the Bot
Refer to the attached screenshot for guidance.
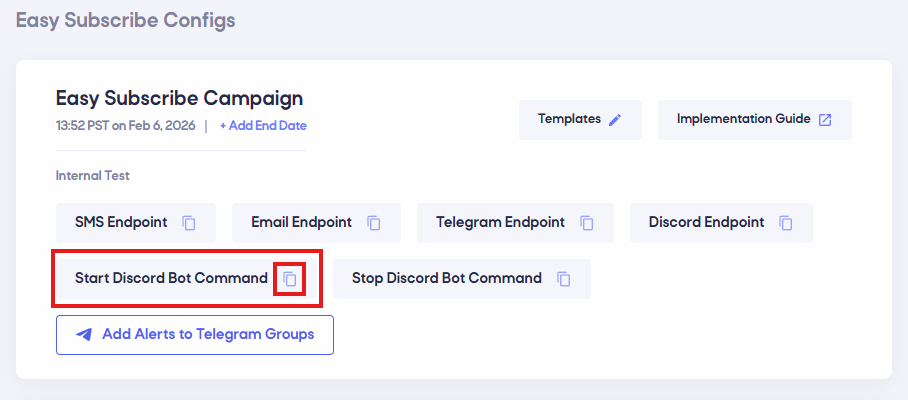
2.1 Start Command
- 2.1.1 Click on your respective Discord Channel and copy the Start Discord Bot Command

Once successfully created, the following message will be displayed.

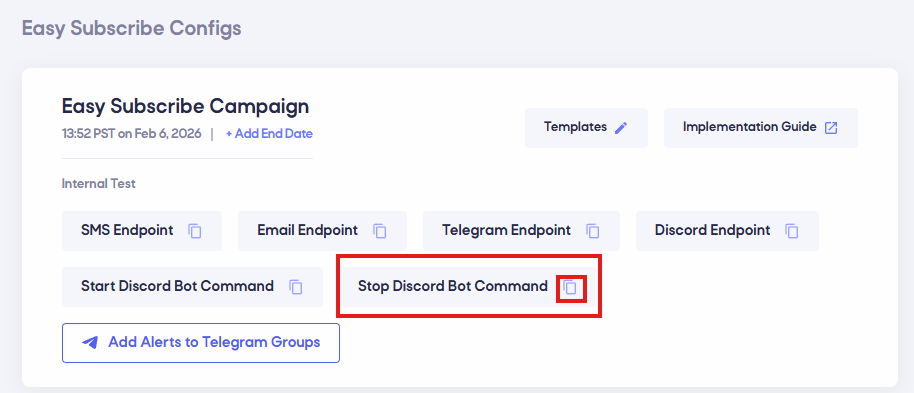
2.2 Stop Command
- 2.2.1 Click on your respective Discord Channel and copy the Stop Discord Bot Command

Once successfully stopped, the following message will be displayed.

Step 8: Integrate Endpoints into Your App
-
Email: Use the email endpoint to send users' email addresses via a POST request. Add success/error handling to manage the response effectively.
-
Telegram: Redirect users to the provided Telegram URL, allowing them to directly subscribe to your Telegram bot.
-
Discord: Integrate Discord channels notifications provided by the Bot Start and Stop commands to directly allow your Discord Bot to emit Notifications to channels.
Below is an example of how to use these endpoints:
  const [emailAddress, setEmailAddress] = useState('');

  const handleEmailAddressChange = (e) => {
    const email = e.target.value;
    setEmailAddress(email);
  };

  const handleSubmit = async () => {
    try {
      const response = await fetch(emailEndpoint, {
        method: 'POST',
        headers: {
          'Content-Type': 'application/json',
        },
        body: JSON.stringify({ emailAddress }),
      }).then((res) => res.json());

      if (response.error)
        // handle error
      else
       // handle success
    } catch (err) {
      console.error(err);
    }
  };

  return (
    <>
      <Input
        placeholder='Email address'
        value={emailAddress}
        onChange={handleEmailAddressChange}
      />
      <Button onClick={handleSubmit}>
        Subscribe
      </Button>

      <Link
        href={telegramBotUrl}
        target='_blank'
        rel='noopener noreferrer'
      >
        <Button>
          Get Telegram Alerts
        </Button>
      </Link>
    </>
  );